Shopping Cart


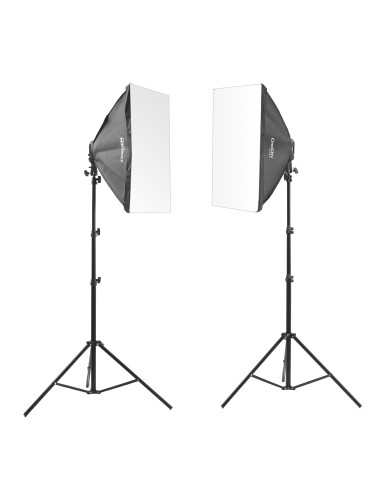
CLAROOM-44682 Lamp Set
The Claroom™ kit offers a powerful lighting solution for home studios, featuring softboxes that enhance image quality and depth. It includes two lamps, allowing for dynamic contrast and the elimination of shadows, resulting in professional-looking photos and videos.
 Security policy
Payments made by Paynow. in an SSL encrypted channel. Full payment security.
 Express shipping
Packing on the day of order. Shipping approx. 1:00 p.m. Delivery time up to 24 hours.
 Return policy
Simple returns and extended return time, up to 30 calendar days for registered customers.
 Free Delivery
Are you planning to shop for more than PLN 399.00? You have free delivery within Poland.
Electronic sales documents

Claroom™ - Studio Lighting Kit for Home Studios
Beat the grey. Shine brightly.
Looking for lights that will make your photos finally bright, sharp, and colorful? Do you run a YouTube channel and want to beat the competition? Want to highlight your product or service? When working with lighting, you'll quickly realize that more light is better. Portrait, fashion, and video photography are particularly demanding. In today's world, homemade solutions aren't enough anymore. Properly chosen lights will have a decisive impact on how your photos or YouTube channel look.
Based on the most commonly used lighting patterns in "home and office" studios, CineGEN® has created the Claroom™ and Vivid™ continuous light kits. With them, you can accomplish a vast majority of film and photography projects under home studio conditions and achieve amazing results.
Benefits
The softbox significantly improves the quality of shots and affects the spatiality of the image. The diffusion fabric softens the light, making it more natural and pleasant to perceive. The lighting kit allows you to work with a lower sensor sensitivity, which in turn enhances color saturation. Increased brightness also enables closing down the aperture, positively affecting the sharpness of the image. Using a pair of lights eliminates mutual shadows, especially important in facial photography - it perfectly masks imperfections and improves skin appearance. The Claroom™ kit is ideal as both main and supplementary lighting for portraits, videoblogging, product, fashion, and children's photography.
- Allows you to work with lower sensor sensitivity, improving color saturation
- Enables increasing the aperture, enhancing image sharpness
- Increases image dynamics (contrast), making the shot visually appealing
- Using a second light fills in shadows on faces and highlights beauty
- Working with continuous lights is simple. All you need is intuition and sensitivity.
Things to Remember
- Softboxes work best at short distances. Place them as close as possible to the illuminated persons or objects, right near the edge of the frame.
- The larger the diagonal, the softer the tonal transition between light and shadow.
- If you need to shine from a large distance - remove the diffusion fabric from the softbox. This will give you even more light.
- The basis of a successful shot is experimentation and playfulness. Plan some time for adjusting the lights and camera settings.
- Don't neglect the background.
- From time to time, check the results on your computer screen. Remember that they will look slightly different than in the preview.
Example Photos Taken with the Claroom™ Kit

Photos by Elżbieta Socharska, Model: Kamila Panasiuk
Photos taken using the Claroom™ kit
Technical Specifications
- Weight:6 kg
- Dimensions:40x40 cm
- Working Height:200 cm
- Reactive Power:520 W (8x 65W)
- Luminous Flux:2600 W
- Color Temperature:5500K
- Sockets:8xE27
- Adjustment:stepped 0 - 50% - 100%
- Tripod Head:standard, 16mm, 1/4"
- Power Supply:230V, mains
Tips
How to Assemble the SOFTBOX Lamp?
The lamp will arrive in a package containing: separately, the tripod, bulbs, fixture, and softbox. Assembling the lamp involves several steps:
- Remove the softbox from its cover, the rods for stretching the softbox, and the diffusion fabric. Set aside the diffusion fabric.
- From the box marked CGLX4, remove the lighting fixture. On the outer edge of the fixture (black plastic) there are eight holes.
- Insert the glass fiber rods into the openings in the lighting fixture. It's important to insert the rods with their THICKER end into the fixture. They should go in with a slight resistance.
- Lay the softbox (dome) on the floor so that the black material touches the floor and the silver side faces upward. Leave the Velcro straps unfastened.
- Place the lighting fixture on the silver surface. Insert the thinner ends of the rods into the pockets sewn into the corners of the softbox dome.
- As you insert the remaining rods, the softbox dome will start to stretch over the bending rods. You may need to use a little force, especially with octagonal softboxes.
- Once the dome is assembled, set up the lighting tripod and attach the fixture to it. Tighten the butterfly screws and fasten the Velcro straps at the back of the dome.
- Secure the bulbs in the fixture.
- Attach the diffusion fabric by fastening it with the Velcro straps to the dome.
Kit Contents
- Tripods:2 pcs.
- CGLX4 Fixtures:2 pcs.
- Softboxes:2 pcs., with diffusers
- Bulbs:8 pcs.
- Napięcie
- 230V
- Lighting type
- Continuous
- Color temperature
- 5500K
- Number of bulbs
- 8
- Emission type
- Fluorescence
- Shape
- Square
- Set type
- With softbox
- Series
- Claroom™
- Softbox size
- 40x40
New
5907564612654
No reviews
Tap to zoom